Showing posts with label Tutorial. Show all posts

Friday, October 22, 2010

Creating a Contact Form with Google Docs

Since there was a good response on my last tutorial, I figured I'd push my luck and try another one. Google Docs are a fabulous thing. Easy to use and accessible anywhere. It wasn't until maybe a month ago that I realized they had an even more fabulous thing - Google Forms. What I love about Google Forms is that you can embed it in a website, blog, or email and all of the responses are automatically entered into a nicely organized Google Docs Spreadsheet. I use Google Forms for the Contact Us form on the sidebar here, but  I've noticed a few blogs also using these for giveaways instead of the typical, 'Comment on this post'. I might even follow that trend. Besides making it easy to pick the winner - Google spreadsheet entries are numbered - it's also much more confidential for the readers since they don't have to leave their email address for everyone to see. The only drawback I can see would be that, since other readers can't see the entries, there's no way for the blogger to verify that the winner was really randomly drawn.

Anyway, I'm going to show you how to embed a Google Form into your blog at blogger, but you can use this same concept in a website or email. If any of you figure out how to embed the form into a Facebook tab, please let me know!

If you don't already have a Google account, create one and then head over to Google docs. From there, select Create new and then select Form.

You should see something like this...


Select the questions you want by either editing the current questions and/or adding new ones...


For my questions, I used name, email, comments, and added a checkbox for the newsletter subscription. You can also change the look of your Contact Form by changing the theme, but I find that the plain theme works the best in blogger.


Once you have that done, you can edit the confirmation screen and embed your form. 

I left my confirmation message as it already was. Unless you want everyone to see all the responses, leave the Publish response summary unchecked. If you check that, then as soon as someone submits their answers, they will see all the other responses too. 

Go back up to More actions and select Embed. You should get a little pop up box with your embed code in it. 

To add to your blog sidebar, log in to blogger and go to Design. On the sidebar you want to use, select Add a Gadget and then HTML/JavaScript. Now you just need to copy and paste your embed code...
 More than likely, you'll have to change the width of your contact form so that it'll fit in your sidebar. My sidebar width is 250, so I changed the form width from 760 to 230. You can also change the length of your contact form. If it's too short, you'll have a scroll bar on it. I changed mine from 624 to 700. This is one of those things that you might have to mess with a little bit before you get it exactly how you want it.

Here's what my contact form looks like in the blog sidebar.


To see the form entries, go back to your Google docs account and click All items. A spreadsheet with the same title as your form should be there. 


Here's what the spreadsheet looks like for my form...


Feel free to share this post, please just let people know you found it over at The Cloth Chronicles. :)


Like this post? Then please vote for me over at Top Mommy Blogs: 
Vote For Us @ Top Mommy Blogs


Thursday, October 21, 2010

Creating a Basic Contact Us Form for Facebook

Disclaimer: There is a reason I'm not a teacher, so if I have utterly confused you with this tutorial, please leave a comment with any questions you might have. 


The Contact Us form on Facebook was one that stumped me for a long time. I wanted one, but I had no idea how to do that static FBML, or whatever it's called, thing. I tried and ended up with a Contact Us tab that had all sorts of weird gibberish on it.

After many late nights (thanks to my love affair with caffeine) I finally figured out how to create a basic contact form for the I Heart Fluff Facebook page. 

It was actually easier than I expected. Best part is, it's free! So, here's how I did it...

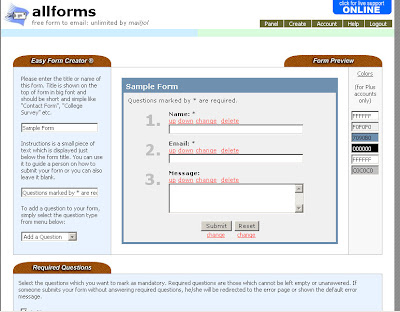
First, head over to http://allforms.mailjol.net/ and register for a free account. You can upgrade to a plus account for $10/year, but the free account has worked fine for me. Once you get your password, log in to your account and click on Create Form (Basic).This is what you should see:


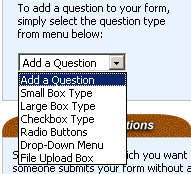
For just a basic contact form, you can leave it as is. But, I would at least change the title to Contact Form. If you want to add more questions, that's simple to do too. I decided to add a little check box for people to sign up for our newsletter. To do that, I selected 'Add a Question' and then 'Checkbox Type'.


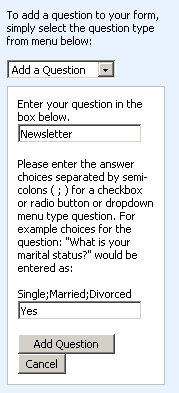
Then, a little box appears and you just fill out the information you want.  So, if you want to make a subscribe to newsletter check box, just type 'Subscribe to Newsletter' for your question and 'Yes' for your answer choice in the second box.


After you create your form, there are a few more questions to answer before you can save. Basically, this just comes down to your personal choice, but make sure you select an email address so you can receive the form comments.

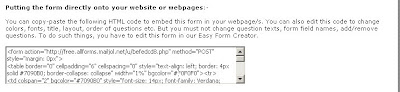
When you save your form, you'll be directed to the page that has the codes. If you want to put this form on your website or blog, just use the HTML code. To add your form to Facebook, you need to use the second available code. It should look something like this: 


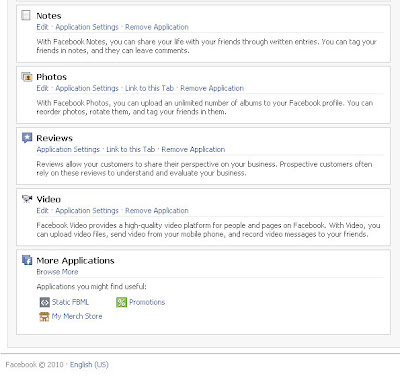
 But, before you can use that code on Facebook, you need to set up a Static FBML tab. First, go to your Facebook page and select 'Edit Page' directly below your profile picture. If you haven't already added a FBML tab, just scroll down to the bottom of the page and under More Applications, there should be a Static FBML option.


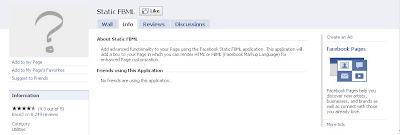
On the Static FBML page, select Add to my Page right below the question mark profile pic.

 
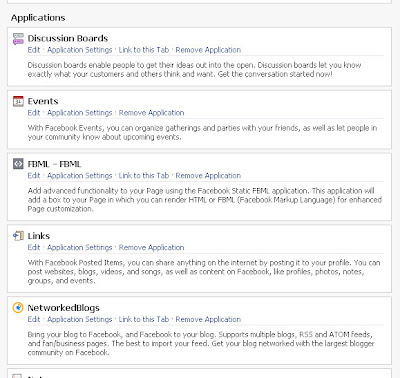
If you already have a Static FBML tab, after you go to Edit Page, just select edit for the FBML application and then scroll to the bottom of the page and select Add Another FBML box.

 Once you've added the FBML tab, go back to your page and select Edit Page again. Then select Edit under the FBML Application.


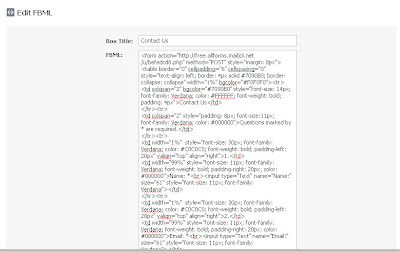
Once you're at the Edit FBML page, just type in the title you want for the tab and then copy and paste the code you created back at allforms. 
Save it and you're done! You should get an email whenever anyone contacts you through this form.

Feel free to share this post, just please let people know you found it at The Cloth Chronicles! :)

If you like this post, I'd love for you to go vote for us over at Top Mommy Blogs! Two clicks and you're done.
Vote For Use @ Top Mommy Blogs


Tuesday, June 1, 2010

Tuesday's Tutorial - Barn Window Message Center

Living on an old farm, I always have a great variety of old materials that I can use for crafting.


I found a whole stack of these windows just sitting in one of our old farm buildings a couple years ago. I dug them out, cleaned them up and I was planning on making some sort of cold frame or small green house with them. Turns out, old and extremely weathered windows don’t hold up to any sort of construction very well. I set them aside and moved on to my next projects, figuring that I’d find a use for them sooner or later…


I’ve wanted some sort of message center for our kitchen for awhile now and it hit me that this would be a great way to repurpose these windows. Because I still wanted to hold on to the weathered and distressed look of the windows, I didn’t bother using primer. By skipping that step, the paint really soaked into the wood showing off the grain and cracks. I used a bluish teal color for my base and then a thin coat of white on top. I finished it off by sanding the edges and adding a couple coats of polyurethane.

I used some fabric covered cork to replace the window panes. I just cut an old corkboard to the sizes I needed and then used some spray adhesive to attach the fabric to the cork. I used my hot glue gun to fasten the panels to the window.

I painted a hanging basket for our mail and used a couple thumbtacks to hold it on one of the panels.


On another panel I used my glue gun again to attach a magnet strip. Then I glued some fabric on one side of another magnet and we use this to hang small items like business cards.


I used some little screw-in hooks on the sides to hold keys and some bigger hooks and a dowel on the bottom for a towel rack and apron hanger.


I think it turned out pretty good! Even hubby likes it! I love the distressed look of the wood and the fabric is the perfect color. The only thing I might have changed would be to make a chalkboard panel using a thin piece of plywood or panel and chalkboard paint. There’s always next time. :)


The Girl Creative
All Thingz Related


NightOwlCrafting