Wednesday, March 31, 2010

Dinner and a Workout


For some reason, I thought it would be a good idea to make homemade ravioli last night. I've never made this or any other kind of pasta from scratch before but I thought how hard could it really be? Hmmm...

I started off with 2 cups of whole wheat flour (thought I'd make healthy pasta), 3 eggs, and a 1/4 tsp of salt. This is what I got...
...a hard, clumpy mass that would never be able to call itself pasta. I pushed the cement pile out of the way and started over with all purpose white flour. I made a little mound of flour and salt then added the 3 eggs.
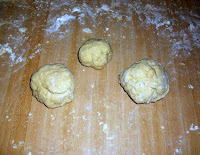
This is where it started to get messy...I tried to mix the flour and eggs with a fork, but I just ended up having egg ooze everywhere. To really mix this together I had to dig right in with my hands. Eventually, it started to form a dough ball which I continued to knead for about another 5 minutes. Then I separated the dough into thirds.
Funny Bun woke up at this time, so I let the dough rest for about 10 - 15 minutes while I changed and fed him. After I had him all settled in his high chair, I started to roll out the dough. This is where the workout really started! Not only is the dough extremely difficult to roll by hand, but I was doing this on our kitchen island, which has wheels! Either I would get banged in the legs whenever I brought the rolling pin back towards me or I would have to chase the island down when I moved the rolling pin away from me. At least someone thought it was funny...
Eventually, I had all 3 dough balls rolled out. There weren't as thin as I had hoped, but they'd work.
For the ravioli filling, I used 8 oz of Ricotta cheese, about 1/4 c of Italian shredded cheese, and a sprinkling of Asiago cheese. To give it a little more flavor, I used garlic powder, oregano, and basil. I also added one egg to help keep everything together.

I have a small scoop that I use for cookie dough, so that's what I used to put the filling on the pasta. Looking back, I should've used something smaller because the raviolis were way too big for me.


I brushed some water on the dough along the outside of the filling and then folded the dough over. Next I pressed the dough down around the filling and used a pizza cutter to cut it into squares.


After they were cut, I pinched the edges to give the ravioli a better seal.


If you aren't going to be cooking the ravioli right away, place them on wax paper in a single layer. If they are touching, they will stick together. You can either store them in the fridge, or put them in the freezer. Once frozen, you can place them all in a storage bag or container.

If you are cooking them right away, bring some water to boil and then add the ravioli. They should only take 3-5 minutes to cook and they will usually start to float when they are done.


Originally I had planned on just putting some olive oil and italian spices on the ravioli...


But because they were so big and kind of thick, I ended up using some spaghetti sauce.


All in all, it probably took me one and a half hours to make these from start to finish. Yes, they were good. But they would've been a lot better if I had one of those pasta machines to get the dough really thin and if they were smaller. I will probably make this again sometime, but it definitely won't be a weekly (or probably even monthly) occurrence. Although, if you want a really good workout for your arms...this would be the way to go!


By the way...if you're wondering what happened to that hard mess of whole wheat flour and eggs...


I crumbled it into a pan...drizzled honey over it...and used it for goat treats!

Tuesday, March 30, 2010

Crispy Oven Baked Fries

Crispy Oven Baked Fries? Forget it!! It can't be true!! Honestly, I've never cared for oven baked fries because, no matter what I did, I just couldn't get them as crispy as the ones fried in a truckload of oil! So, I've experimented the past few months and I think I've figured out a few little secrets that seem to help. First I cut my potatoes in the morning while Funny Bun is eating his breakfast. Then I let them soak in a bowl of water in the fridge until it's time to start supper. This helps draw some of the starch out of the potatoes, which causes the less-than-desired sogginess of the fries. I also add a little sugar when I'm mixing the potatoes with the spices. That just helps get that crunchier coating on the fries.

Here's the Recipe:
4 Russet Potatoes, cut into strips or wedges
Olive Oil
Your choice of seasonings (For these fries I used Paprika, Basil, Oregano, Parsley, and Sea Salt)
1-2 tsp of sugar
Parmesan Cheese (optional)

After letting your potatoes soak in water all day, drain and dry them. Drizzle with olive oil and add seasonings, sugar, and parmesan cheese.


Toss potatoes until they are covered. Arrange in a single layer on cookie sheet or baking pan. A pizza stone also works great for this! Too bad I broke mine!


Bake in a 425 degree oven for around 30 minutes or until they reach the desired crispiness. It also helps to turn the potatoes halfway through cooking or turn the oven on low broil for the last 5 minutes or so.


Serve with a side of seasoned low fat sour cream...delicious!!

Sleepy Time


Ever since I became pregnant and actually started really noticing all those cute baby items you could buy, I've seen those little door hangers for baby's room. They are pretty much do not disturb signs for your bundle of joy. One side lets you know when he is in peaceful slumber and the other lets you know when it's safe to come in. Of course they're cute, but I really never saw the point in having one...until I was going through my pics and found this one of Funny Bun sleeping...


Seriously! How cute is that?? And what better way to use this picture than to incorporate it into his own little sleepy time door hanger...


I did get a little sloppy with the outlining on the sleepy side (that's what happens when a 9 month old tries to help) so I might end up redoing it. Although...isn't the 'messiness' of our crafts what gives them character?

Saturday, March 27, 2010

Alfredo Pizza

While reading a magazine I saw this recipe for a Chicken Cordon Bleu Pizza. It looked delicious! But, once I read all the ingredients, it wasn't something I wanted to feed my family! I could handle the refrigerated pizza crusts (even I use them for a quick fix meal at times) and of course I don't think you can go wrong with cheeses. What bothered me was that the 'meat' for the pizza was cut up chicken nuggets and bacon bits! Are either of those even real meat?


I didn't have any refrigerated pizza crusts on hand so I found a good pizza dough recipe online and threw the ingredients into my bread machine to mix. I had a whole fryer chicken I had bought on sale for 99 cents a pound and some bacon I got for 1 dollar a pound. I boiled the chicken with some onion and garlic, deboned it, set a little to the side for my pizza and the rest went in the fridge for BBQ chicken sandwiches the next day. I cooked the bacon in the microwave so it wasn't as greasy.

Once the crust was ready I spread about 1/4 to 1/3 cup of Alfredo sauce onto the crust than sprinkled some bacon, chicken, and fresh sliced mushrooms over that. I added some mozzarella, monterey jack, cheddar, and asiago cheeses and baked it at 350 degrees for 20 minutes. It turned out fantastic and paired prefectly with a small side salad.