
Disclaimer: There is a reason I'm not a teacher, so if I have utterly confused you with this tutorial, please leave a comment with any questions you might have.
The Contact Us form on Facebook was one that stumped me for a long time. I wanted one, but I had no idea how to do that static FBML, or whatever it's called, thing. I tried and ended up with a Contact Us tab that had all sorts of weird gibberish on it.
The Contact Us form on Facebook was one that stumped me for a long time. I wanted one, but I had no idea how to do that static FBML, or whatever it's called, thing. I tried and ended up with a Contact Us tab that had all sorts of weird gibberish on it.
After many late nights (thanks to my love affair with caffeine) I finally figured out how to create a basic contact form for the I Heart Fluff Facebook page.

It was actually easier than I expected. Best part is, it's free! So, here's how I did it...
First, head over to http://allforms.mailjol.net/ and register for a free account. You can upgrade to a plus account for $10/year, but the free account has worked fine for me. Once you get your password, log in to your account and click on Create Form (Basic).This is what you should see:
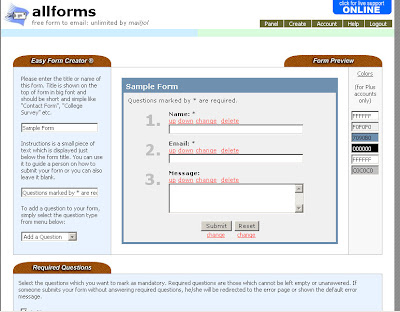
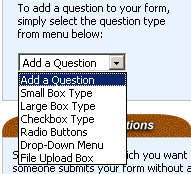
For just a basic contact form, you can leave it as is. But, I would at least change the title to Contact Form. If you want to add more questions, that's simple to do too. I decided to add a little check box for people to sign up for our newsletter. To do that, I selected 'Add a Question' and then 'Checkbox Type'.
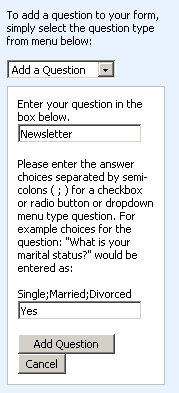
Then, a little box appears and you just fill out the information you want. So, if you want to make a subscribe to newsletter check box, just type 'Subscribe to Newsletter' for your question and 'Yes' for your answer choice in the second box.
After you create your form, there are a few more questions to answer before you can save. Basically, this just comes down to your personal choice, but make sure you select an email address so you can receive the form comments.
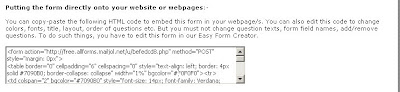
When you save your form, you'll be directed to the page that has the codes. If you want to put this form on your website or blog, just use the HTML code. To add your form to Facebook, you need to use the second available code. It should look something like this:
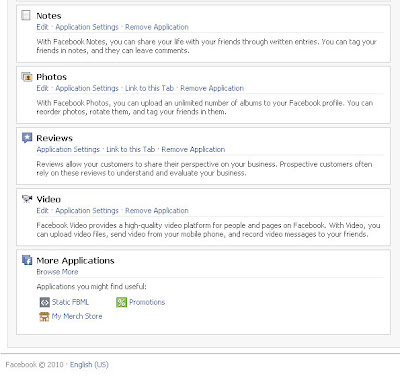
But, before you can use that code on Facebook, you need to set up a Static FBML tab. First, go to your Facebook page and select 'Edit Page' directly below your profile picture. If you haven't already added a FBML tab, just scroll down to the bottom of the page and under More Applications, there should be a Static FBML option.
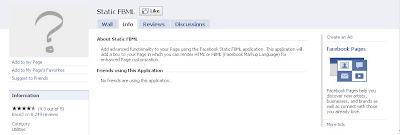
On the Static FBML page, select Add to my Page right below the question mark profile pic.
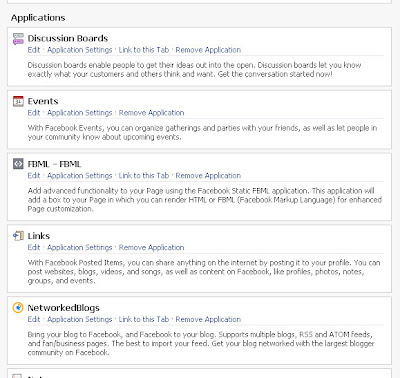
If you already have a Static FBML tab, after you go to Edit Page, just select edit for the FBML application and then scroll to the bottom of the page and select Add Another FBML box.
Once you've added the FBML tab, go back to your page and select Edit Page again. Then select Edit under the FBML Application.
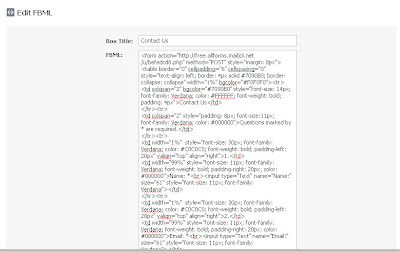
Once you're at the Edit FBML page, just type in the title you want for the tab and then copy and paste the code you created back at allforms.
Feel free to share this post, just please let people know you found it at The Cloth Chronicles! :)
If you like this post, I'd love for you to go vote for us over at Top Mommy Blogs! Two clicks and you're done.

♡
THANKS!!! You are so awesome! I have been wanting this for awhile, but didn't know how to do it!
ReplyDeletewow, can't believe you figured that out! thanks so much!
ReplyDeleteThanks ladies! I'm just glad everyone can understand my directions. :D
ReplyDeleteeek... will attempt this another day when i've had more caffeine and am less tired! :) bookmarking...
ReplyDeleteThis worked perfectly! Thanks so much for the great instructions!
ReplyDeleteThank you so very much! This is a very easy to use tutorial! I appreciate it!
ReplyDeleteTHANK YOU!! <3
ReplyDelete